The parameters in red color are dynamic. They change depending on how you implement the cookie solution on Iubenda and the site destination (in my case demo.tagmanageritalia.it).
In my case, the cookiePolicyId code is 20508754 (you’ll see it later) in the screenshots below.
STEP 2 – Modify the script to instruct Google Tag Manager
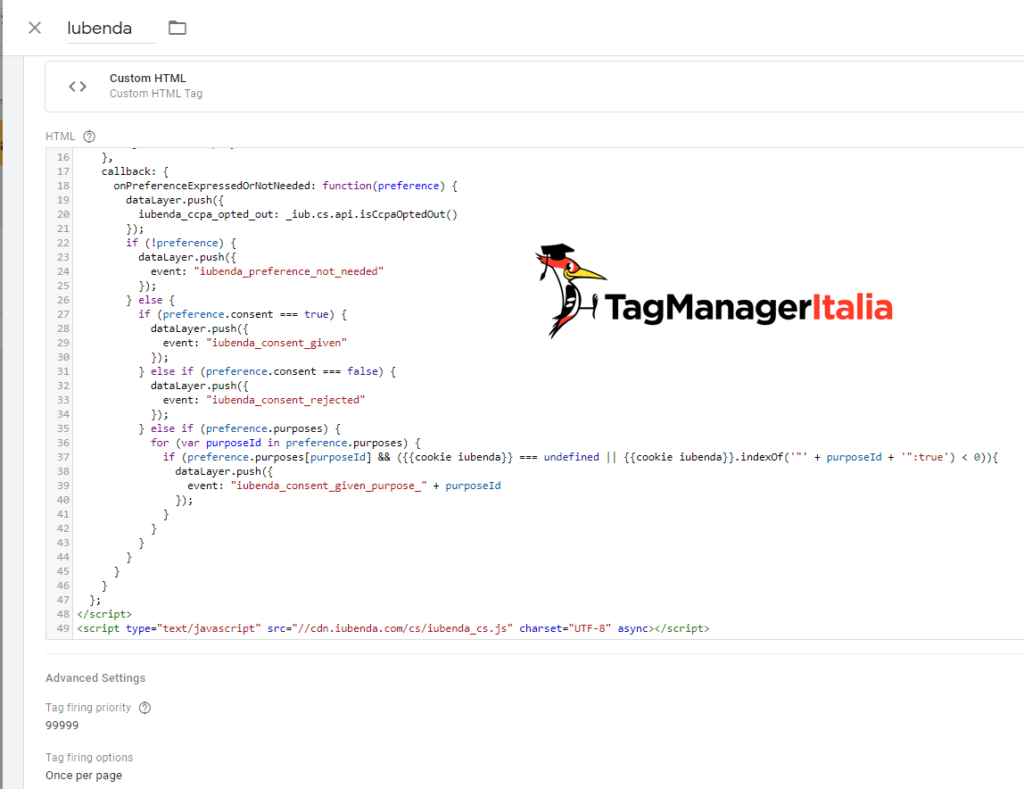
Now that you get the script you will need to add a piece of code to instruct Google Tag Manager when the user accepts one of the five categories or not.
This instruction will be sent with a dataLayer push by using a custom event.
You have to add blue values to the code. The code will be something like this:
You can find items that you must to focus on in blue.
timestamp = time the user accepted
version= Iubenda script version
purposes= accepted categories (true as value) and not accepted categories (false as value)
id= it’s the cookiePolicyId 🙂
Next steps:
Create 5 triggers, one for each 5 Iubenda custom events
Create 5 variables to extrapolate the value of the accepted category that now resides within the cookie
Create 5 universal negative triggers that are useful to simplify implementations.
Step 5 – Create 5 custom event triggers
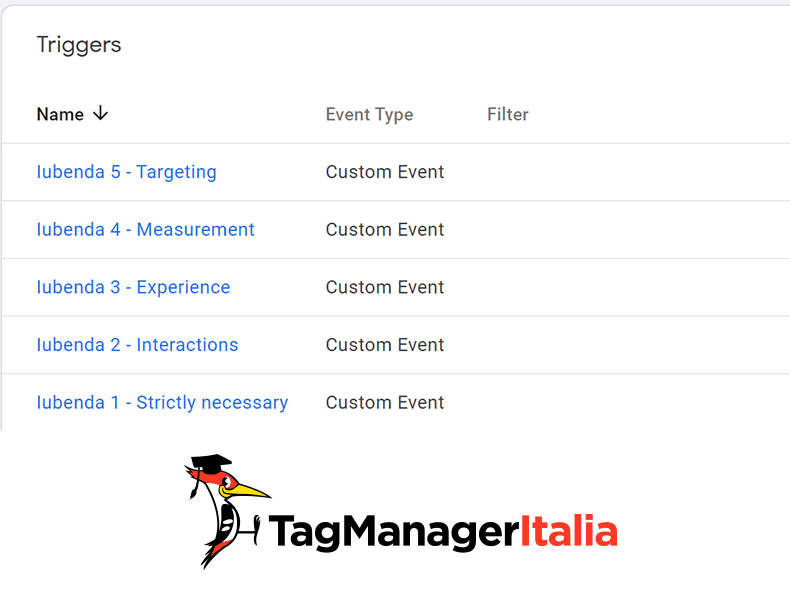
You will have to repeat this step 5 times, changing the event name.
The number identifies the category:
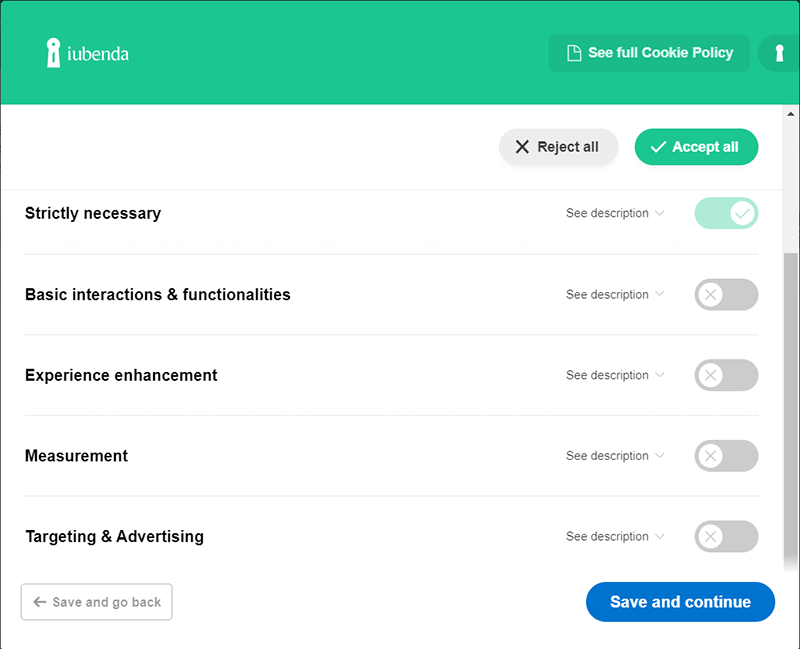
Strictly necessary
Basic interactions & functionalities
Experience enhancement
Measurement
Targeting & advertising
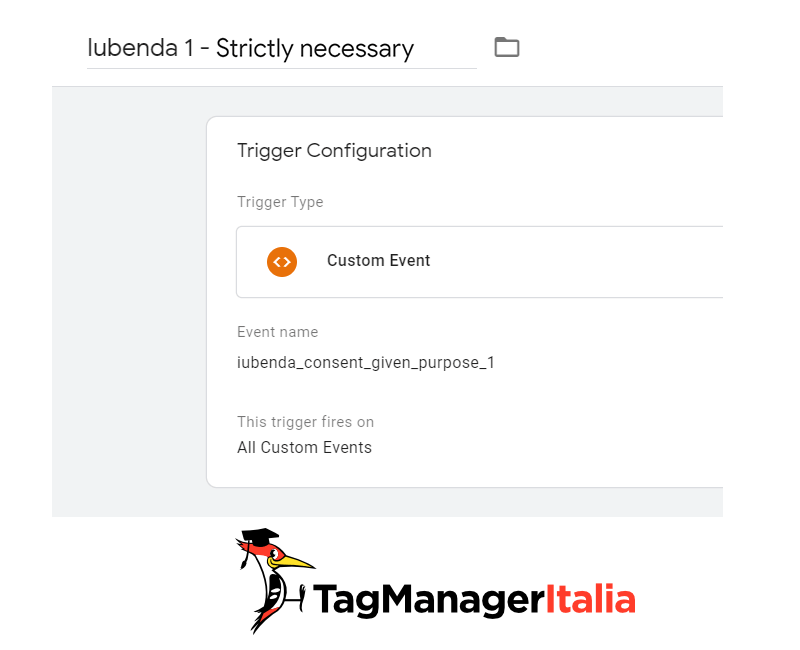
Let’s configure iubenda_consent_given_purpose_1
Trigger > New > Trigger Configuration
Trigger Type: Custom Event
Event Name: iubenda_consent_given_purpose_1
This trigger fires on:All Custom Events
Rename Trigger: “Iubenda 1 – Strictly necessary”
Do the same for:
iubenda_consent_given_purpose_2 with this name “Iubenda 2 – Interactions”
iubenda_consent_given_purpose_3 with this name “Iubenda 3 – Experience”
iubenda_consent_given_purpose_4 with this name “Iubenda 4 – Measurement”
iubenda_consent_given_purpose_5 with this name “Iubenda 5 – Targeting”
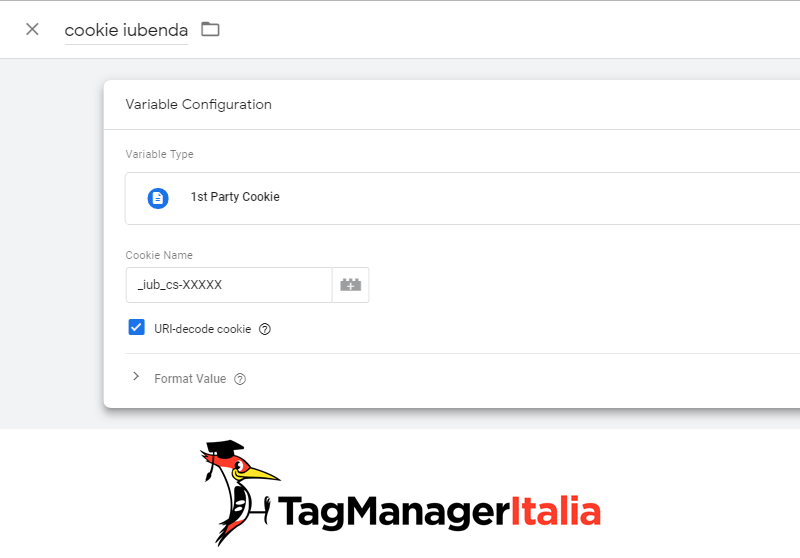
Great, now let’s create the 5 variables that will allow you to understand from the Iubenda cookie if the user has accepted one of the specific categories or not.
This step is necessary to create universal negative triggers 🙂
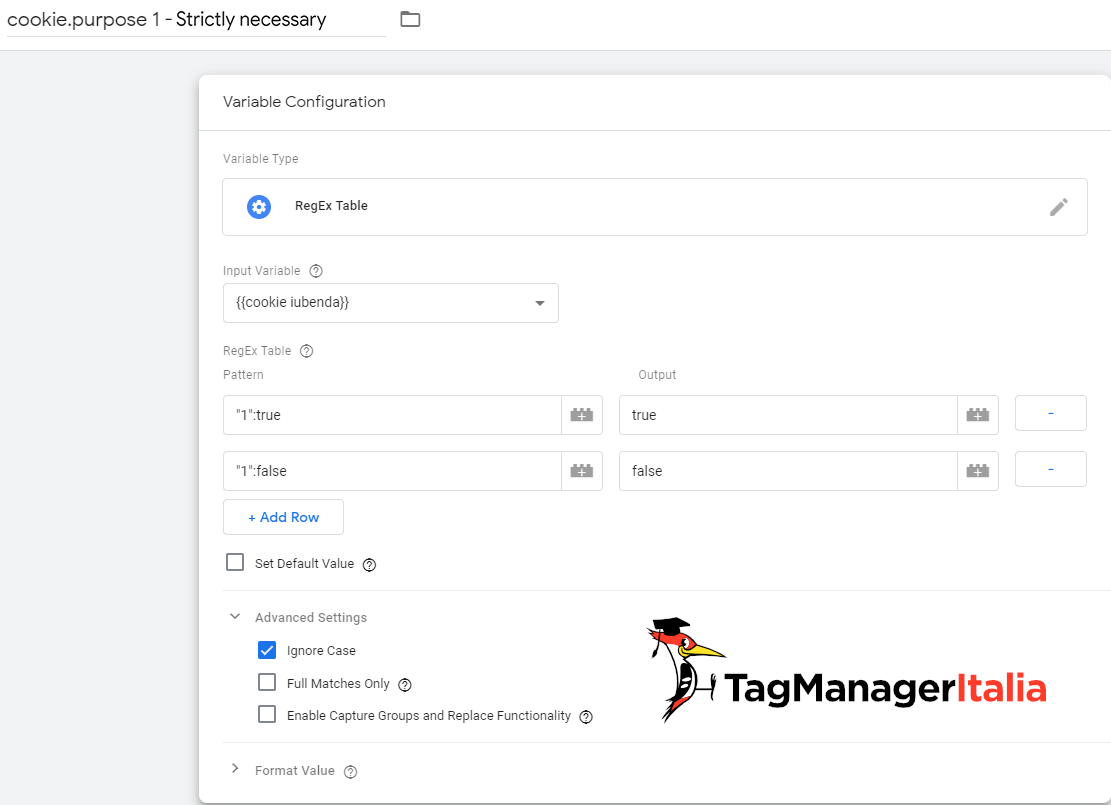
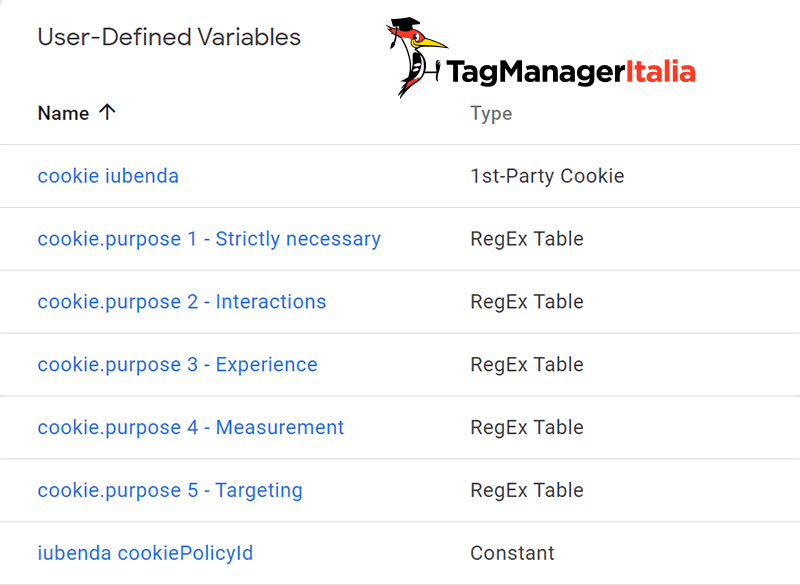
Step 6 – Create 5 consents variables for each category
At this point, you have a variable containing the Cookie of preferences. Now you can create 5 variables to manage all categories of consents. To do this you have to use regular expressions.
Do the same for the other 4 variables by changing the value within the pattern: enter the appropriate number and name.
The second one:
Pattern: "2":true ► Output:true
Pattern:"2":false ► Output:false
Variable Name: cookie.purpose 2 – Interactions
The third one:
Pattern:"3":true ► Output:true
Pattern:"3":false ► Output:false
Variable Name: cookie.purpose 3 – Experience
The fourth one:
Pattern:"4":true ► Output:true
Pattern:"4":false ► Output:false
Variable Name: cookie.purpose 4 – Measurement
The fifth one:
Pattern:"5":true ► Output:true
Pattern:"5":false ► Output:false
Variable Name: cookie.purpose 5 – Targeting
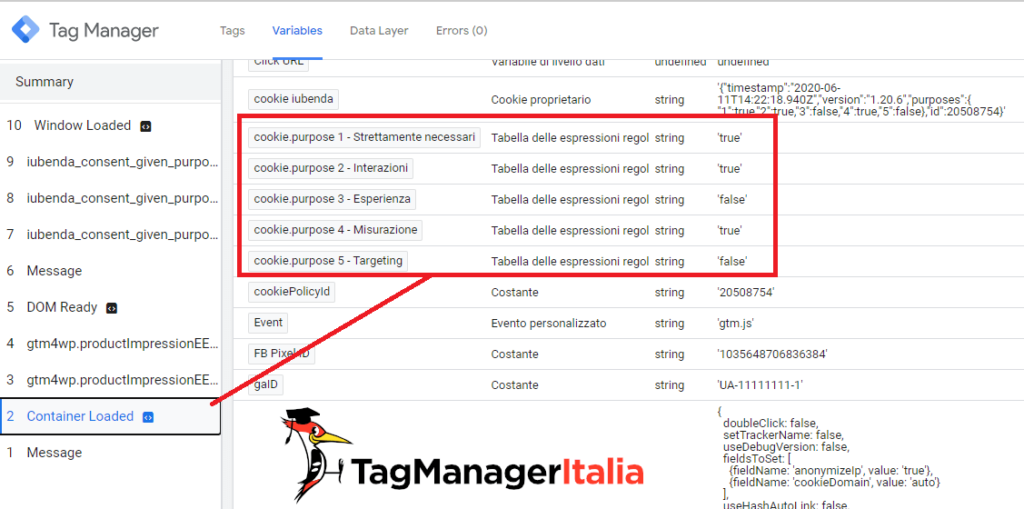
Here’s the final result:
BUT WHAT ARE THESE VARIABLES FOR?
Now I tell you.
The user’s preference value will appear before DOM Ready.
In other words, there will be no more problems in the management of Google Tag Manager’s Built-In Events (such as the Page View which is called Container Loaded since 10 June 2020).
Yuppieeeeeeee!
Almost there, let’s create universal negative triggers and configure tag 🙂
STEP 7 – Create universal negative triggers
This trigger type has the particularity of adapting to any event type. So it doesn’t matter if Google Analytics tag or Facebook will be fired on click, scroll, and so on.
You will have to create 5 triggers, one for each category.
Universal negative trigger blocks any tag firing if it’s configured as “trigger in exception”.
So if the user doesn’t accept a specific Iubenda category, you have to create a trigger.
Nothing complicated: now I’ll explain it 🙂
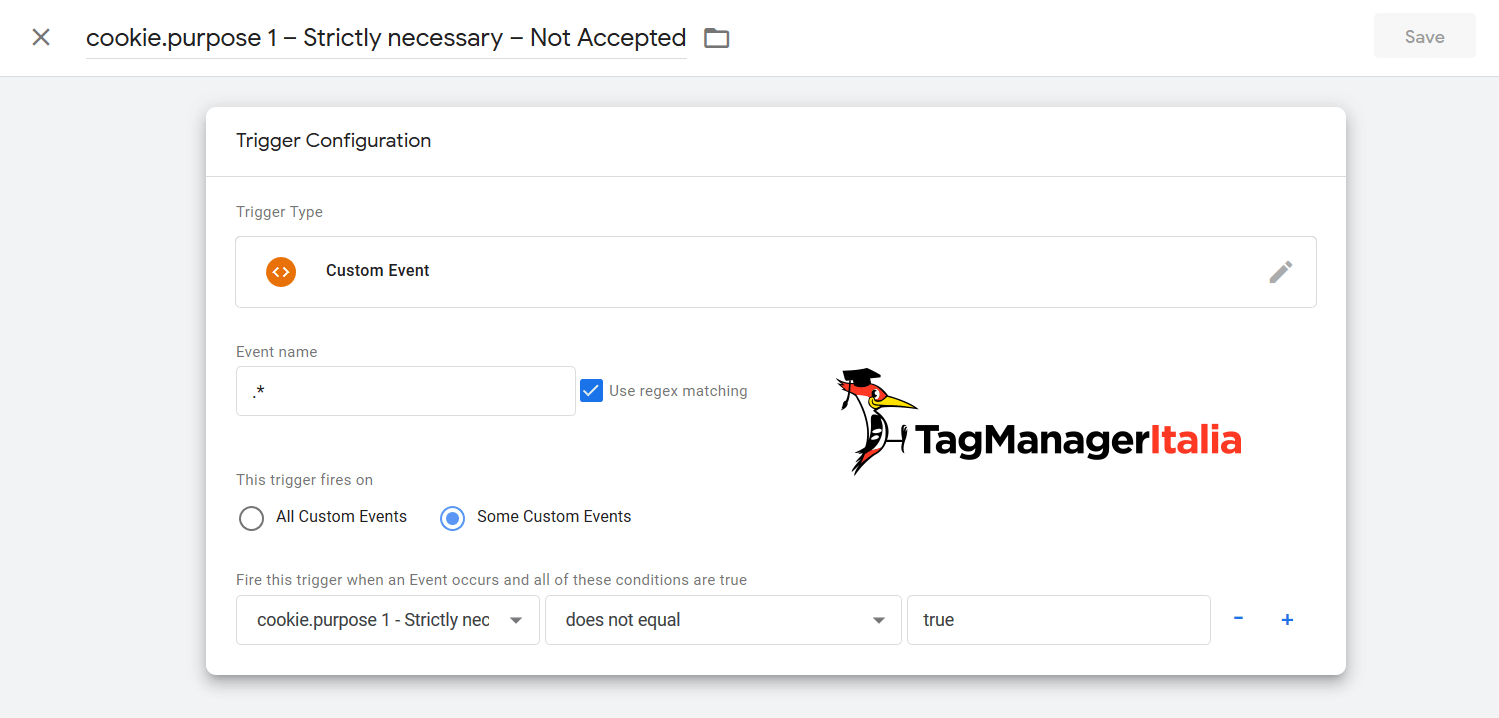
Triggers > New.
Trigger Type: Custom Event
Event Name:.*
Check Use regex matching
This trigger fires on: cookie.purpose 1 – Strictly necessary does not equal true
Rename: “cookie.purpose 1 – Strictly necessary – Not Accepted”
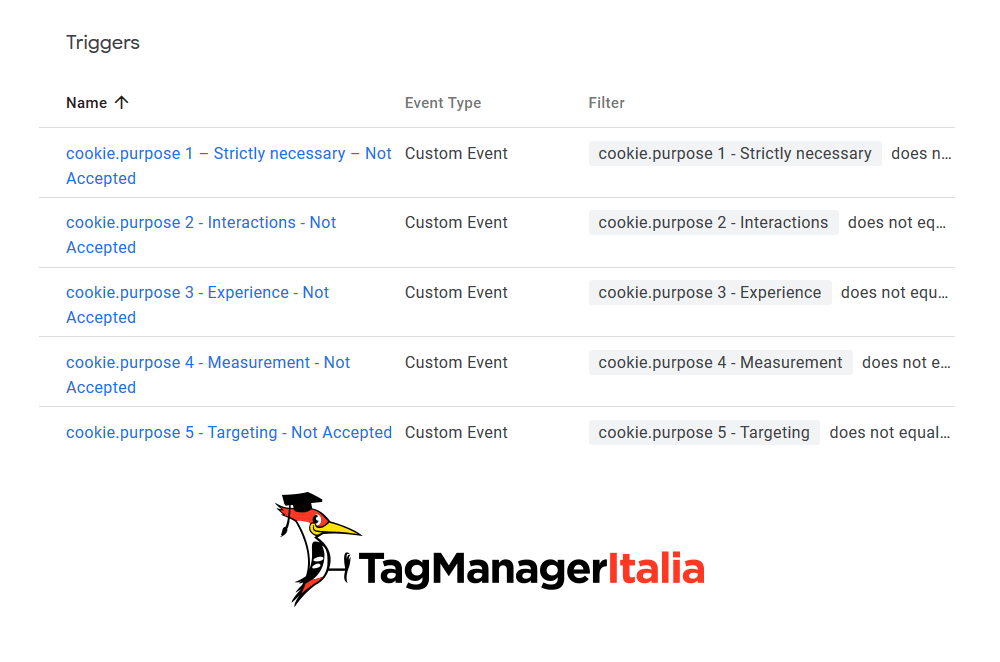
Do the same for the remaining 4 triggers.
The second one:
This trigger fires on: cookie.purpose 2 – Interactions does not equal true
Rename: “cookie.purpose 2 – Interactions – Not Accepted”
The third one:
This trigger fires on: cookie.purpose 3 – Experience does not equal true
Rename: “cookie.purpose 3 – Experience – Not Accepted”
The fourth one:
This trigger fires on: cookie.purpose 4 – Measurement does not equal true
Rename: “cookie.purpose 4 – Measurement – Not Accepted”
The fifth one:
This trigger fires on: cookie.purpose 5 – Targeting does not equal true
Rename: “cookie.purpose 5 – Targeting – Not Accepted”
Yeah! You did it, now you just have to configure all the tags based on the category.
STEP 8 – Update triggers and tag
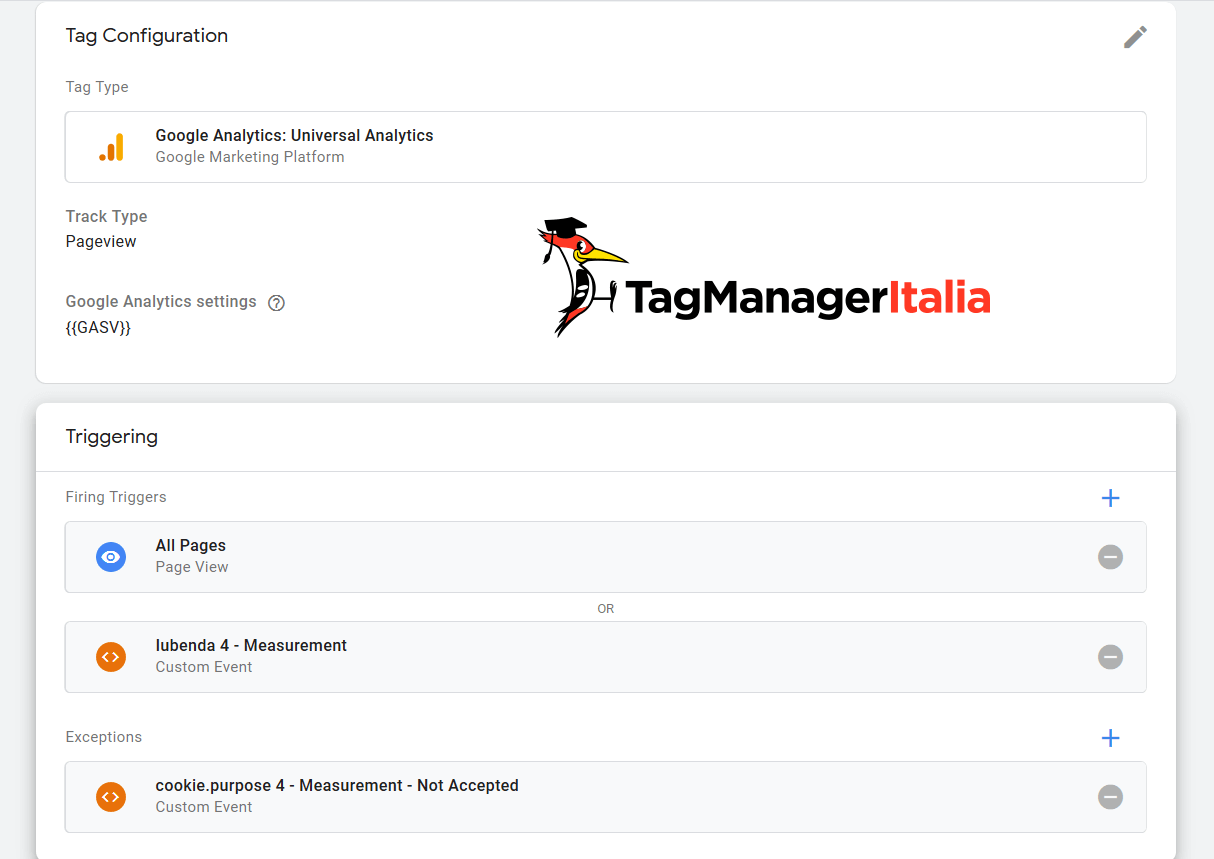
Thanks to the combination of Custom Event Triggers and Universal Negative Triggers you can implement any tag type, for example Google Analytics pageview tag (you can set it as Measurement).
At this point, you have to add 2 triggers to be in compliance with the GDPR:
Iubenda 4 – Measurement as trigger
cookie.purpose 4 – Measurement – Not Accepted (as trigger in exception)
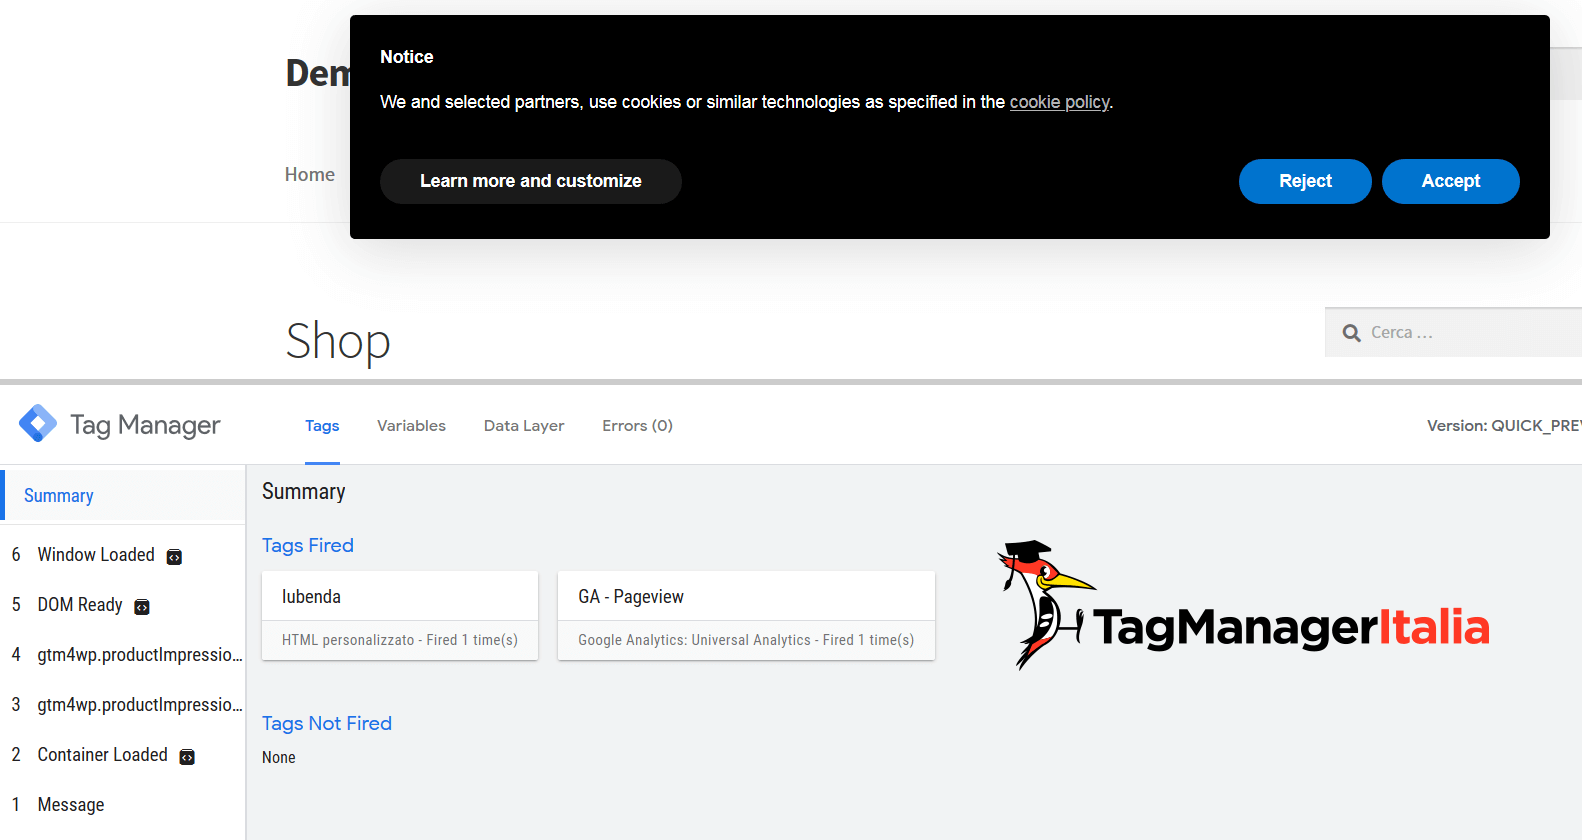
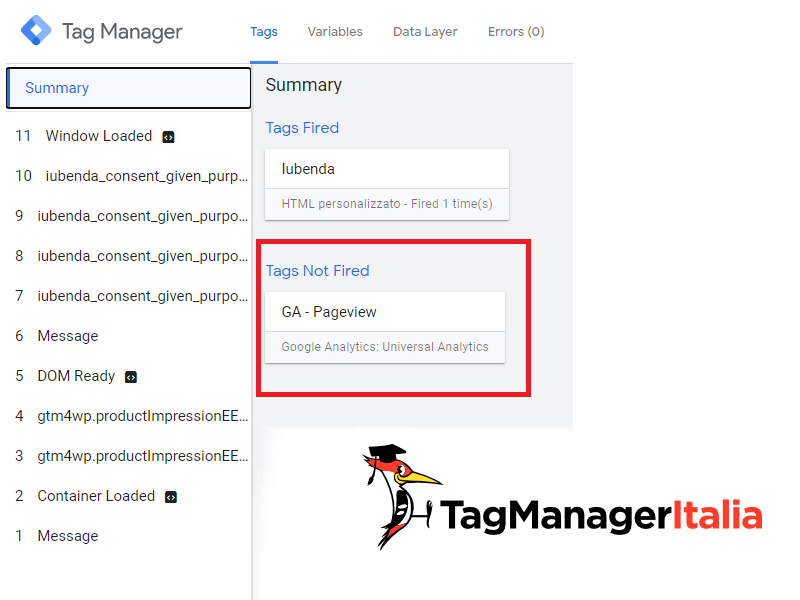
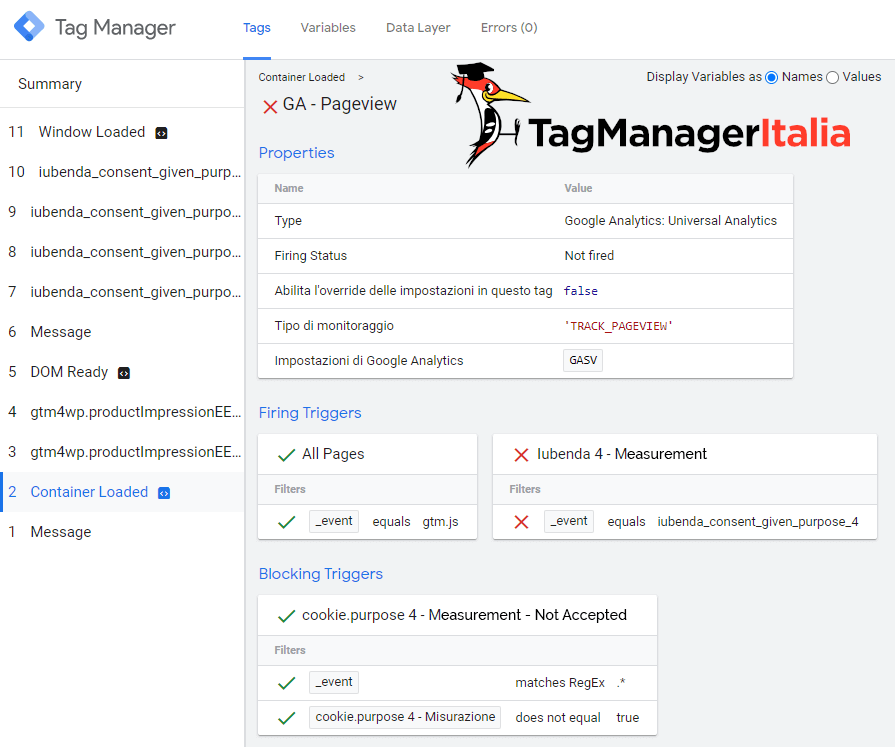
Before publishing any changes, check the correct tag functioning by activating the Preview and Debug Mode.
You can see that Universal Negative Trigger blocks anything 🙂
Great! Thanks to Google Tag Manager you can correctly implement category consent with Iubenda.
What do you think about this guide? Do you think it is helpful? Let me know in the comments below.


Ale
15 04 2022
Ottima guida, complimenti e grazie
Matteo Zambon
27 04 2022
Di nulla 🙂
Lu
14 09 2021
ciao guys, isn’t it that iubenda is supposed to do all this automatically? they say nothing about adding all those tags
Matteo Zambon
11 10 2021
It’s because you can add it with the plugin on your CMS. But I suggest this configuration 🙂